
"Queen Bee" has been on my worktable and work board all through this summer. I have the intention of entering her into a call for entry in January. PAQA-South, (Professional Art Quilters Alliance-South) has an exhibition call coming up called Art Quilts whimsy, April 23 - June 22, 2014, Page-Walker Arts & History Center, Cary, NC. Even though I take "Queen Bee" pretty seriously, she fits the definition of 'whimsy' quite easily. So here I am pushing to get another quilt done for a deadline. I really am my own worst enemy!

So progress? The first thing I did was blow her up to size. She should finish out with her border at exactly 60" x 60". I want her square and cannot exceed 60". We'll see what happens when I get to the border. After blowing her up, I redrew areas that needed tweaking with a sharpie marker.

I decided to do things a bit differently with this piece so the first thing I started on was the lilies. I drew them with fabric markers onto fusible backed muslin, paper still attached and fused my colored petals onto the muslin.

This will allow me the opportunity to adjust things a tad on the board by moving each of the flowers where I wish them to land. As I satin stitch the flowers onto the background all the raw edges will be covered. I cut each flower carefully down around the edges. Now I can move the whole flower around.

There are two groups of lilies in the quilt, a red-orange and a yellow-orange. Here is a look at the yellow-orange one. I moved on to doing her bee skep hair which has a primary fabric of a honeycomb. Below you can see how her beehive came to life.


Sometimes things just drop into your lap. The three shots of hand-dyes are all from the same piece of intense and exquisite hand-dyed cotton.
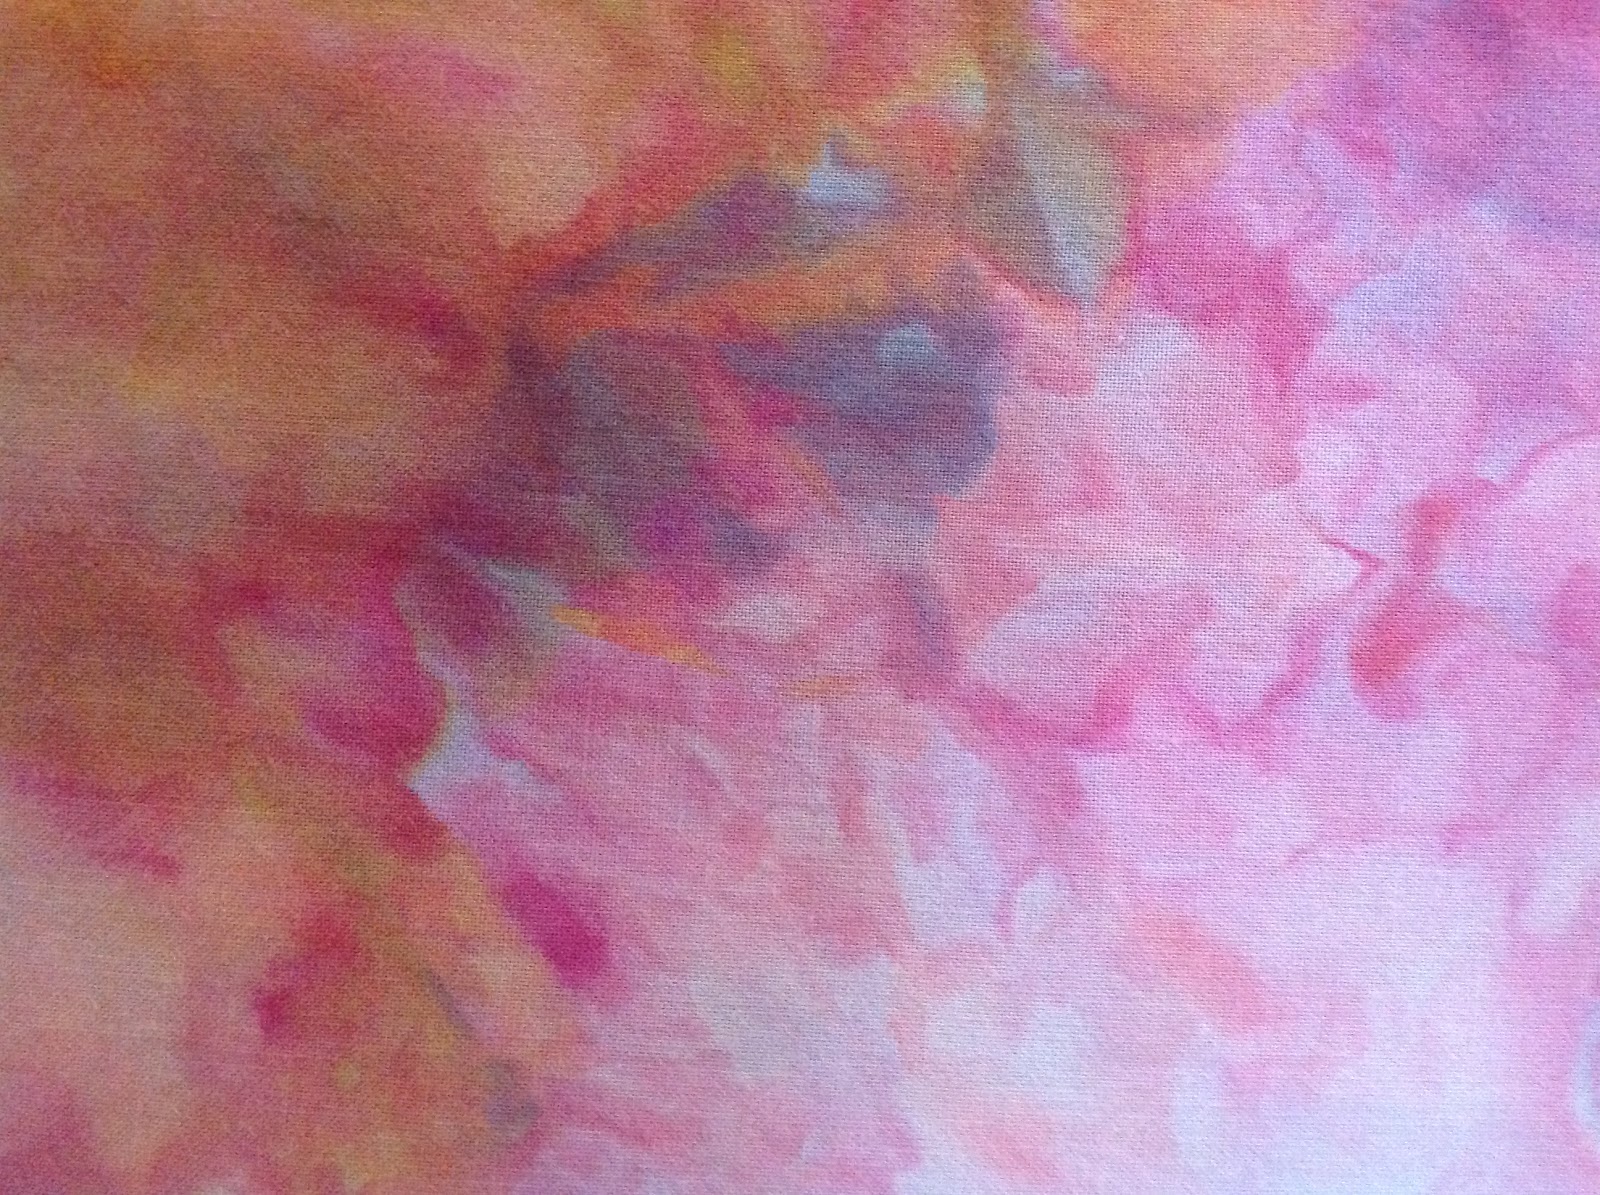
When I was in Lowell for the Quilt Festival, I spent my last half hour looking quickly at the vendors. Some buttons to my left caught my eye and as I passed a booth to get to the buttons this piece stopped me in my tracks.

Without hesitation, or even knowing it's price, I grabbed hold of it and bought it on the spot. It is perfect! I would like to mention that it comes from a dyer in Florida, Gabriele Bullard. Her pieces were amazing and I am trying to get another piece as we speak. Her website is not up yet but she gave me her card with her email, fabrilish@gmail.com. If you don't dye your own and you need something spectacular, I highly recommend getting in touch with her. As difficult as you can imagine it was for me to cut this piece, it had to be cut and has become Bee's gorgeous skin.

The first piece I cut was the most important. Her face and neck had to be from just the right area with a mix of pink, peach and yellow.

Here you can see that I defined her neck with some of the lavender areas of the same fabric. The addition of her aqua eye brings her to life.

Add to that her already created beehive and my black and white drawing is beginning to pop off the paper.

I continued creating her skin areas, her arms and hands. You can begin to see what I mean when I said that this fabric was perfect. I added shadow areas to both arms and the hands to help give them dimension.

I had chosen a print for the background and a batik for her dress and had it all in place with the edges basted and on my workwall for quite a while. After living with it for a while, I realized that I hated it. So I went to my silk cache and chose 5 beauties to become my background. I drew a swirly background on my cartoon with a colored marker and started in. All my silks are kept folded in my large armoire. Getting the folds to come out is brutal. They really should be kept on a roll, but I just don't have the space.

I created pattern pieces with tissue so that I could butt each shade up to one another. They were backed with fusible and ironed to the deep blue shantung which I had the most of.

You can see how invaluable Super Mario is to the whole process. I wanted some difference and movement so there are 5 shades of blue and green making up the background.

Having the background ironed in place, I pinned it to my workboard and started pinning each of the fabric colored muslin pieces in place. Bee's eye pops even more with the teal background next to her.

You can see that the dress pieces are missing from the mix. I am currently working on redrawing the honeycomb on Bee's bodice. Not easy making honeycomb move with the curvature of her body. Once I get the drawing right, I will use my window light box idea to draw it out on my choice of fabric with fabric markers.

You can see in this one how the more violet areas of the fabric were used to provide shadow in the arm. Her honey pot and the honey are next.

I worked for a long time trying to get the right amount of fluid movement in her hand. She will be supporting a bee with her index finger. Bees, of course, go on last.

And here is the placement, so far, of the lilies around her face. Stems and leaves will slide under them, creating the look of a garden.
But then I realized that the counterpart to "Queen Bee", "Mariposa" the butterfly princess, has a perfect outlet for a call for entry in Texas. Butterflies and Their Beautiful Kin is an upcoming exhibition at the Texas Quilt Museum with a deadline to enter of November 15, 2013 (which is coming up rather fast - "can she do it?", you say). The exhibition will premier in June of 2014 and travel until 2017. If I want to enter this I need to move my butt. So I started my redraw of "Mariposa" last night.


Her eyes are now open and intent on the butterflies that will be flying around her left hand. This piece will come in at 40" or above and will be square as well as "Queen Bee".
Well, I best stop fooling around with this computer and get to work! You will be seeing next how Bee's dress is shaping up and how Mariposa is beginning.
No comments:
Post a Comment